![]()

| Procedure for Manually Configuring Novell Small Business Suite 5.0 for Internet Access 5.0 Install Modem and Configure for Dynamic Communication Load INETCFG Select Boards 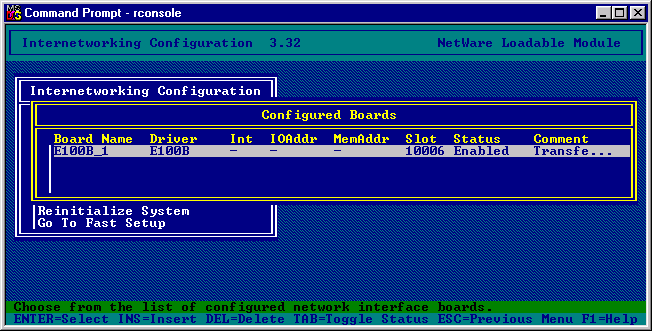 Press the “Insert” key to allow the installation of another Board. You will be presented with a list of network cards to install select WHSMAIO. 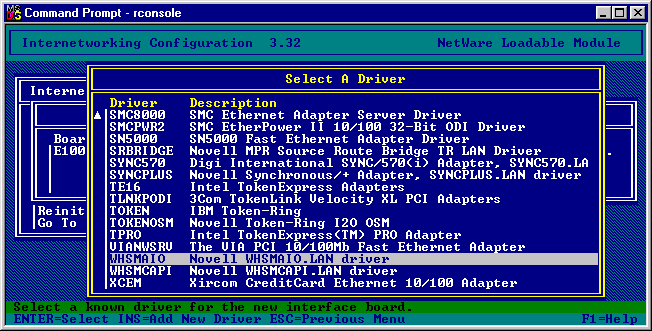 Give the board a name COMPORT and you will now be presented with a configuration screen. 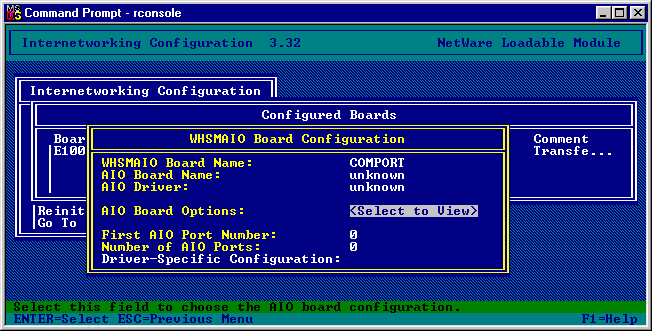 Select an AIO Board Option, then say “yes” to INETCFG automatically loading the AIO driver. 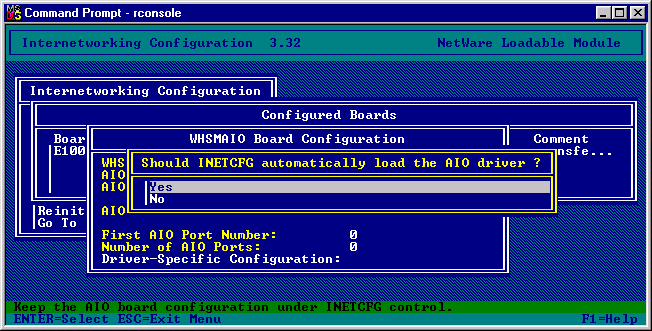 Select AIOCOMX Serial Port (COMx). 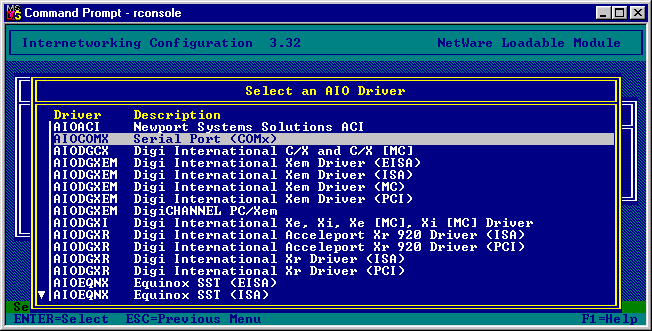 Select the Serial port settings for the “comport” that you will be using. (Usually the defaults should be adequate otherwise verify them in the machines BIOS)  Your settings should now look like the following: 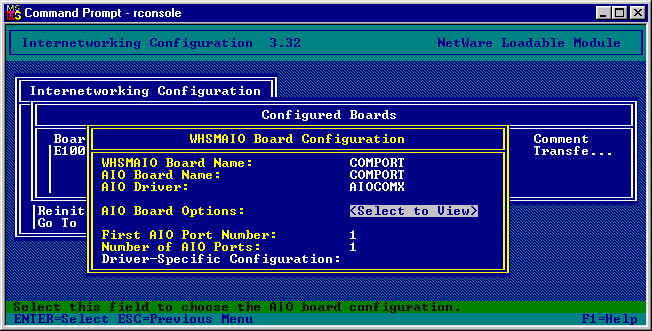 Save the changes. 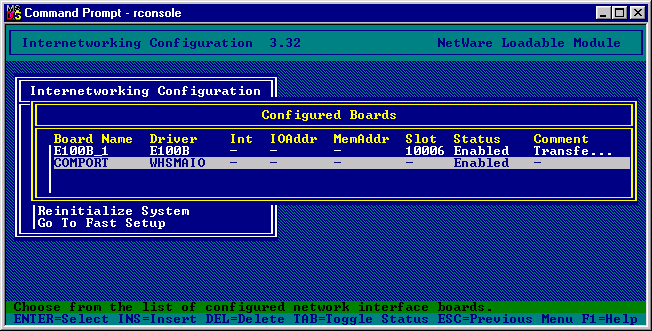 Select network interfaces. 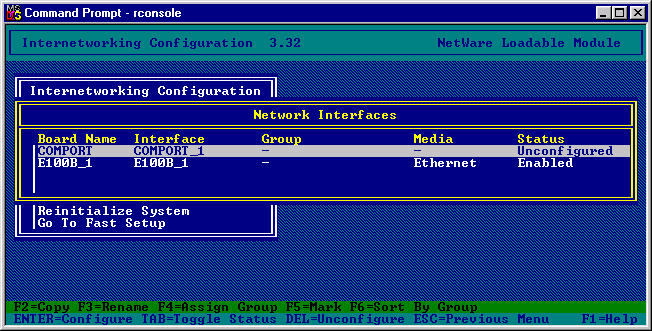 Now select the COMPORT and agree to the PPP routing. 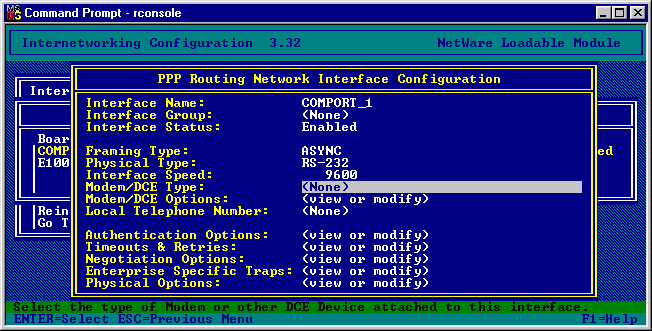 Change the Interface Speed to that supported by the modem, and select the Modem/DCE Type and select the appropriate modem. 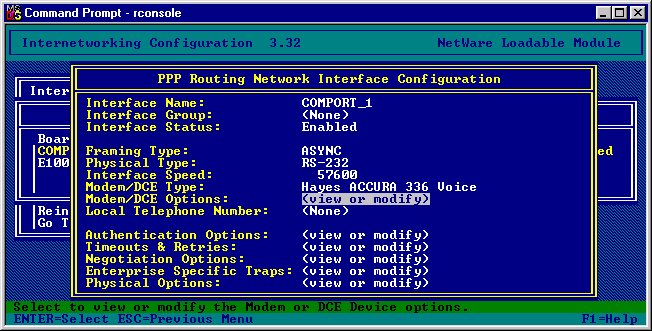 Save the changes and now select the “WAN Call Directory” from the main menu. 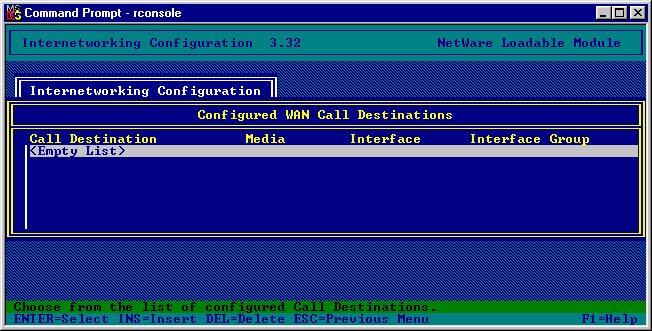 Press “Insert” Give the call destination a name, e.g. “ISP”, accept this and also accept the PPP routing methodology. You will now be presented with the call details. 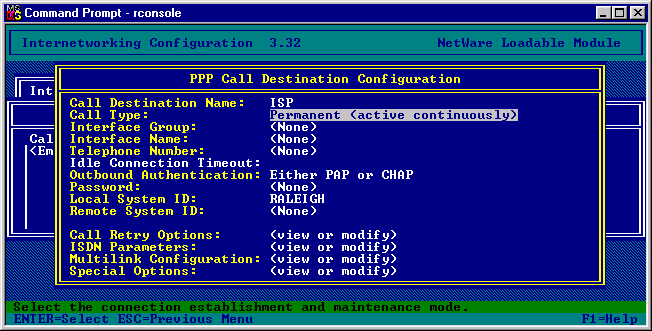 Change the Call type from “Permanent” to “On Demand”. Select the Interface Name as “COMPORT_1” Enter the ISP’s telephone number. Modify the Idle Connection Timeout to the amount of time require. (I usually use 3 minutes) Enter your ISP’s account password in. (I used ****** to indicate this on screen) Enter your ISP’s username as the Local System ID. (Leave lower case) Create a Remote System ID. 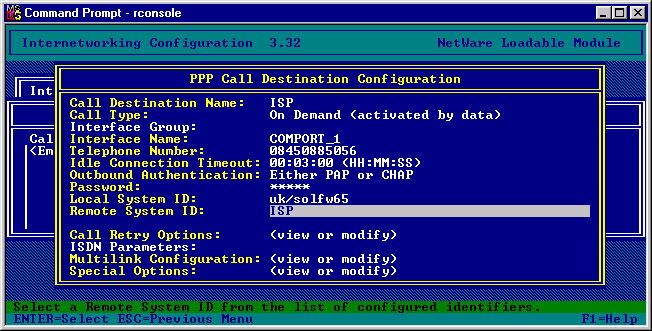 Now confirm and save your settings. From the main menu select Protocols. Then select TCP/IP Protocol Configuration, and finally select DNS Resolver Configuration. Now enter the Domain name for your site and also enter the DNS servers on the internet. 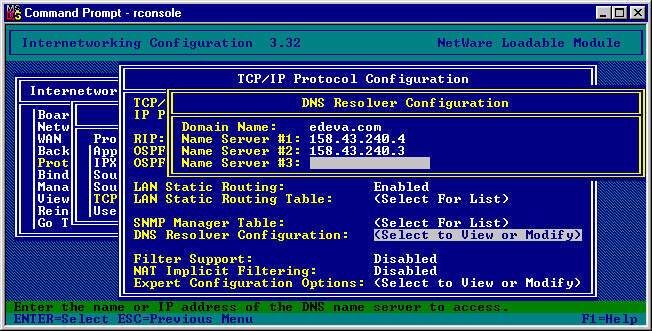 Update the changes to the TCP/IP settings. From the main menu select Bindings. 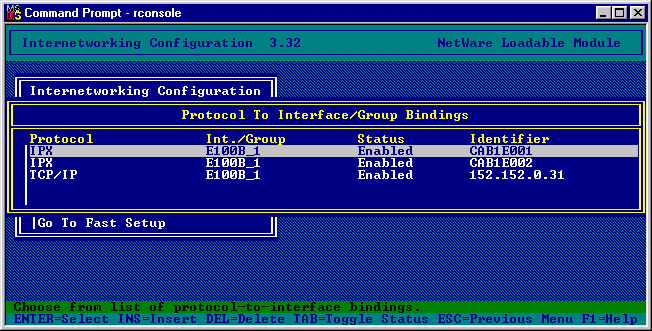 Press “Insert” and select the TCP/IP protocol. Then select “A Network Interface” and finally select the “COMPORT” board. 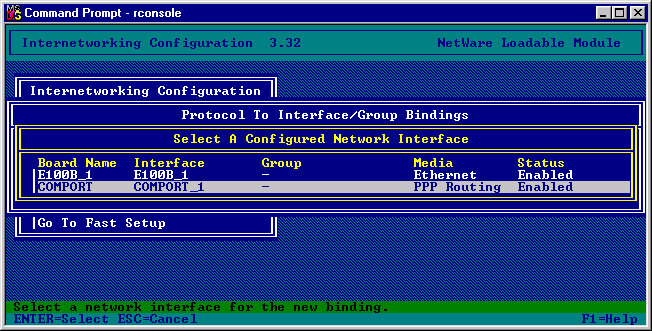 You will now be presented with the following: 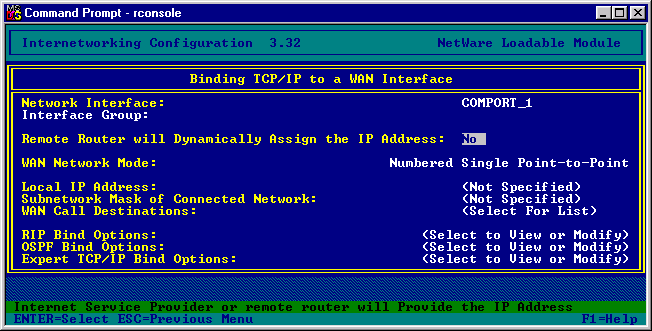 Change the “Remote Router will Dynamically Assign the IP Address” to YES. Select the WAN Call Destinations. 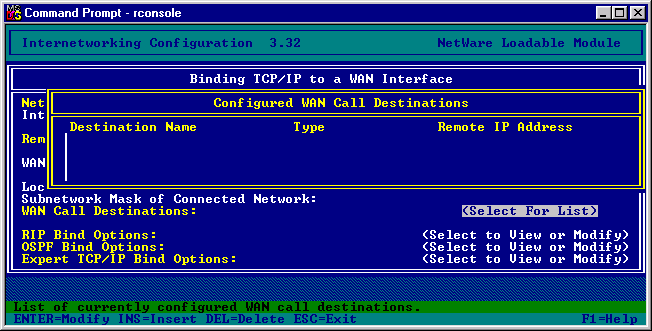 Press the “Insert” key to add a WAN Call Destination.  Select the WAN Call Destination as the one we created earlier. Add in a “Static Routing Table” for this entry. 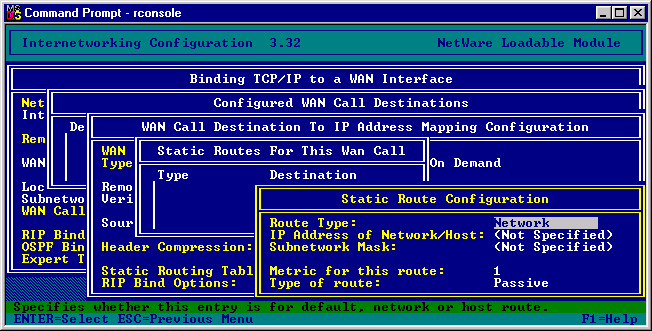 Select the “Route Type” as the Default Route, and confirm the settings so that your table will be as follows: 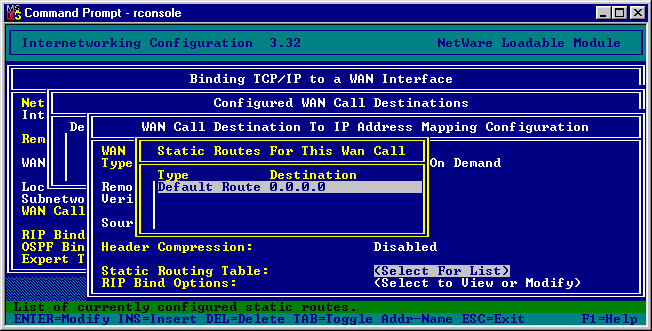 Save the Database changes we have made and then return to the Bindings screen. 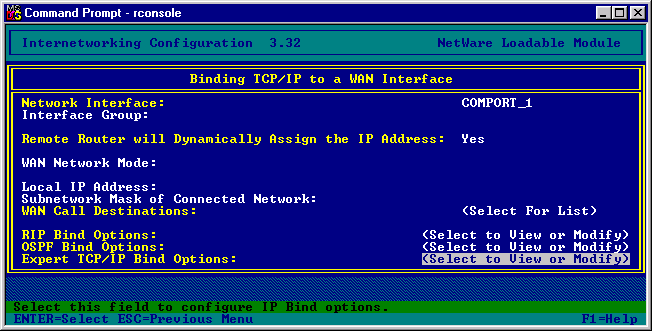 Select the Expert TCP/IP Bind Options. 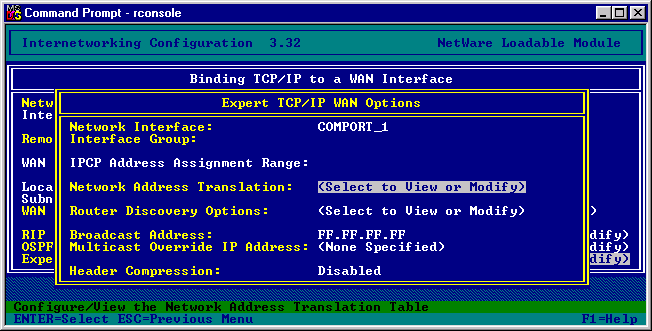 Select the Network Address Translation option. 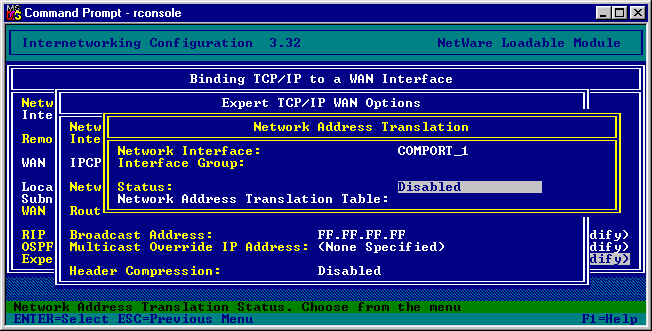 Modify the status field to read “Dynamic Only” 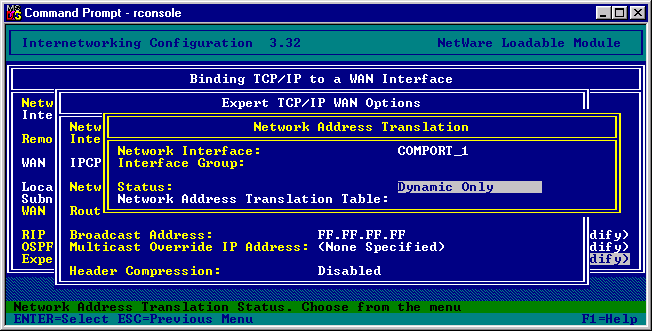 Save all the changes that we have entered. After the changes have been completed and the server has been re-booted it will now act as a router to the Internet. |
|||
Next Document |
|||
© 2000 Edeva Solutions Ltd
Last revised: 17th May 2000