![]()

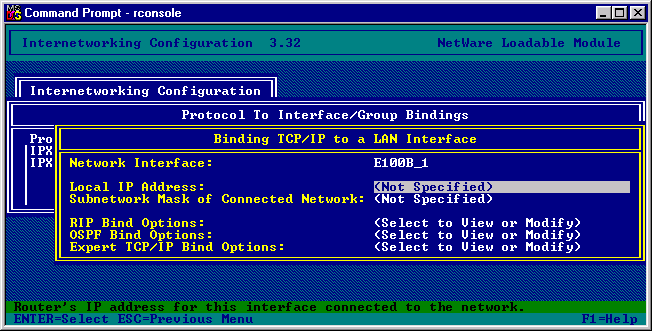
| Procedure for Manually Configuring Novell Small Business Suite 5.0 for Internet Access 3.0 Install IP on the Private LAN Card Note: See TID 10010836 on installing MPR and NIAS to access your ISP Go to the System Console on the Server and “LOAD INETCFG”. Most installations have not run this application before so you will be presented with the following screen: 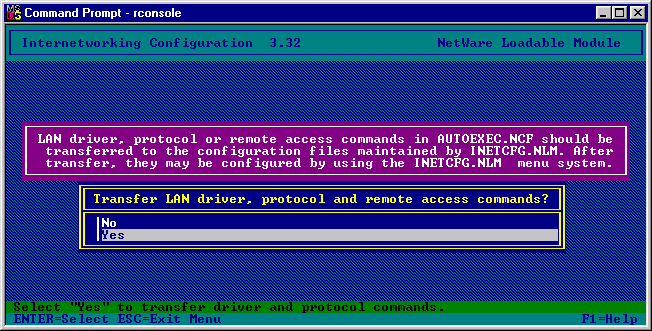 This is quite normal, you must allow the application to transfer the settings from AUTOEXEC.NCF to INETCFG.NCF. You will now be presented with the following screen:  We are configuring an on-demand WAN connection using our Modem to the Internet, so we will need to use the Standard Installation method. After all this we will be presented with the normal INETCFG screen: 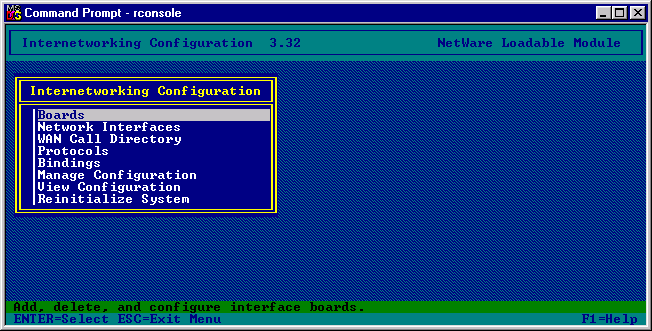 From the INETCFG Main menu select Protocols. 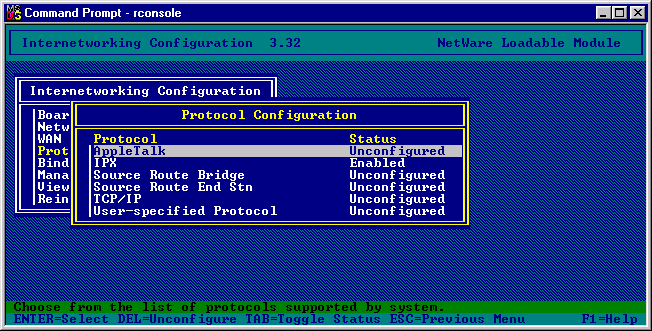 From the Protocol Configuration Menu select TCP/IP. 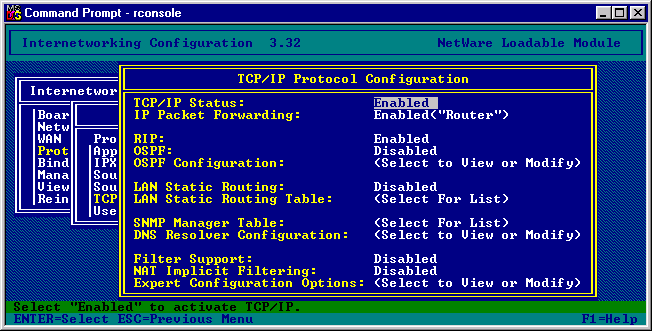 Leave all the entries as they are, later we will be modifying the “LAN Static Routing”. Confirm the update of the TCP/IP settings, and then return to the main menu. From the main menu select Bindings. 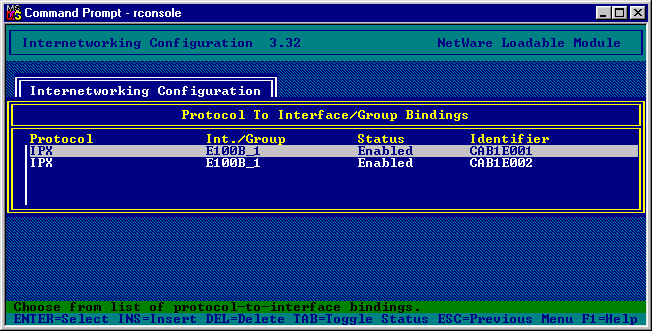 Press the INSERT key and a binding creation menu appears. 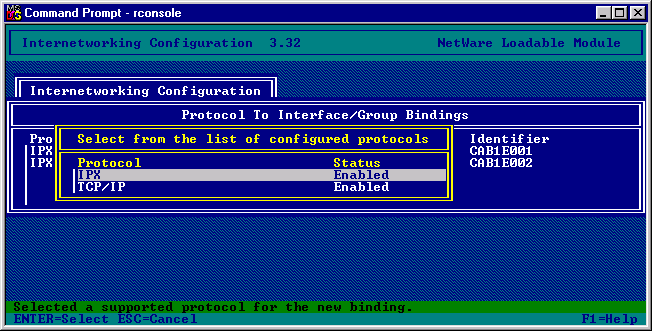 Select TCP/IP and you will now be asked, what you wish to Bind to, select “A Network Interface” 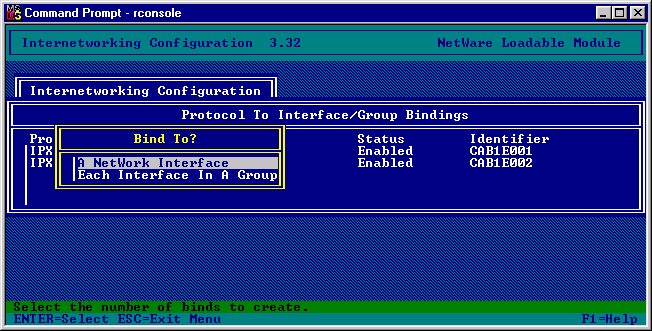 Select your Network Interface card connected to your company’s Local Area Network. 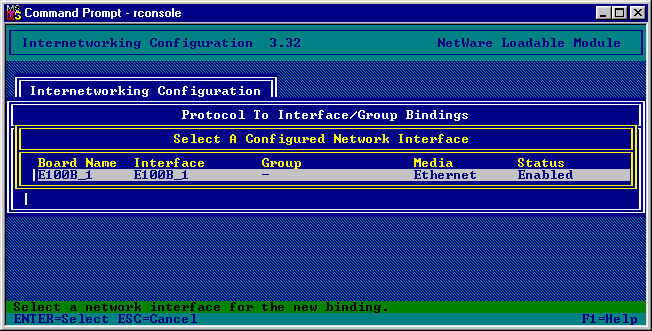
 You will now have to select an IP address and the appropriate Subnetwork Mask for the server on your network. This does not necessarily need to be a legitimate IP address on the Internet, if anything this should be one conforming to your company’s standards. In our example we will use the following details: IP Address: 152.152.0.31 Subnet Mask: 255.255.0.0 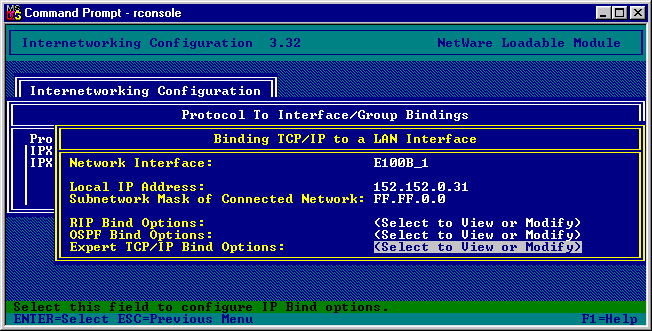 Press Escape and then confirm the TCP/IP settings. You will now be presented with the following Bindings: 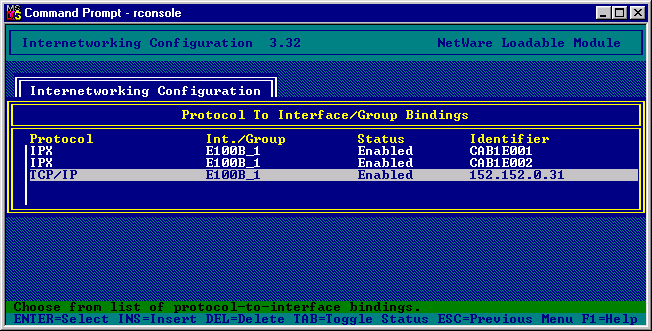 Now come out of the application completely and confirm the saving of the settings that we have entered. 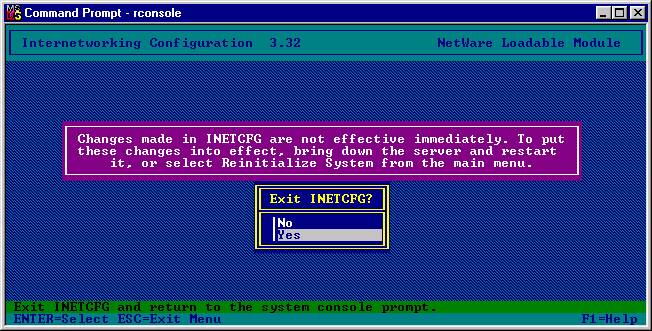 To activate the changes the server must be rebooted. |
|||
Next Document |
|||
© 2000 Edeva Solutions Ltd
Last revised: 17th May 2000